✨ Overview & Concept
Traditional hand-drawn vector animation often requires duplicating entire layers dozens of times across canvas artboards and manually nudging coordinates frame-by-frame. For emotes, badges, and stream alerts (which typically cap at 15–60 frames), this is tedious and error-prone.
The InkAnim Animation & Motion System (IAMS) allows you to keep your artwork in a single resting position and simply draw a **visual motion path** in Inkscape indicating where and how that object should move over time.
InkAnim never rasterizes or modifies your original SVG on disk. Motion guide paths are evaluated dynamically in memory, transforming vector coordinates on the fly and hiding the trajectory paths during final render.
📁 Layers & Groups Structure
IAMS operates on Inkscape layers and groups:
- The Animated Group/Layer: An Inkscape group (
<g>) or layer containing the graphic elements you want to animate together (text, stars, character art). - The Motion Path: An open path element (
<path>) placed directly inside that group with its label set toMove {...}.
<g inkscape:label="Star Layer" inkscape:groupmode="layer" id="layer1">
  <!-- The Visible Artwork -->
  <path id="star_graphic" d="..." style="fill:#facc15;" />

  <!-- The Motion Guide (Trajectory) -->
  <path id="orbit_guide"
        inkscape:label="Move {f:1-20 ease:out rev}"
        d="..."
        style="stroke:#ff0000;fill:none;" />
</g>
🎨 Authoring in Inkscape
You can author motion paths using any of Inkscape's standard drawing tools:
- Bézier / Pen Tool (B): For linear slides, curved arcs, and organic s-curves.
- Spiral Tool (F9): For dramatic orbit, vortex, or spin-in effects.
- Straight Lines: For clean edge-to-center slides or marquee traversals.
Setting Path Labels in Inkscape
There are two convenient places to set the Move {...} label in Inkscape:
Method 1: Layers and Objects Panel (Ctrl+Shift+L)
The fastest and cleanest method is using the Layers and Objects dock. You can see all your layers, graphics, and motion paths in one organized tree. Simply select the path and rename its label directly in the list:
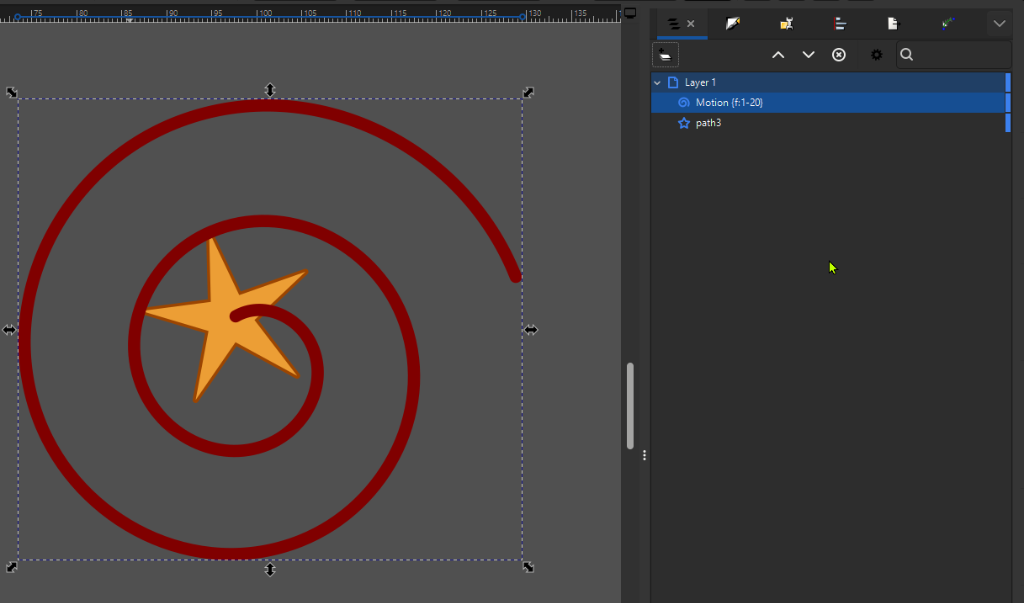
Move {f:1-20} guide path and artwork nested under Layer 1.
Method 2: Object Properties Dialog (Shift+Ctrl+O)
Alternatively, right-click any path and select Object Properties (or press Shift+Ctrl+O). Type your configuration into the Label field and click Set:
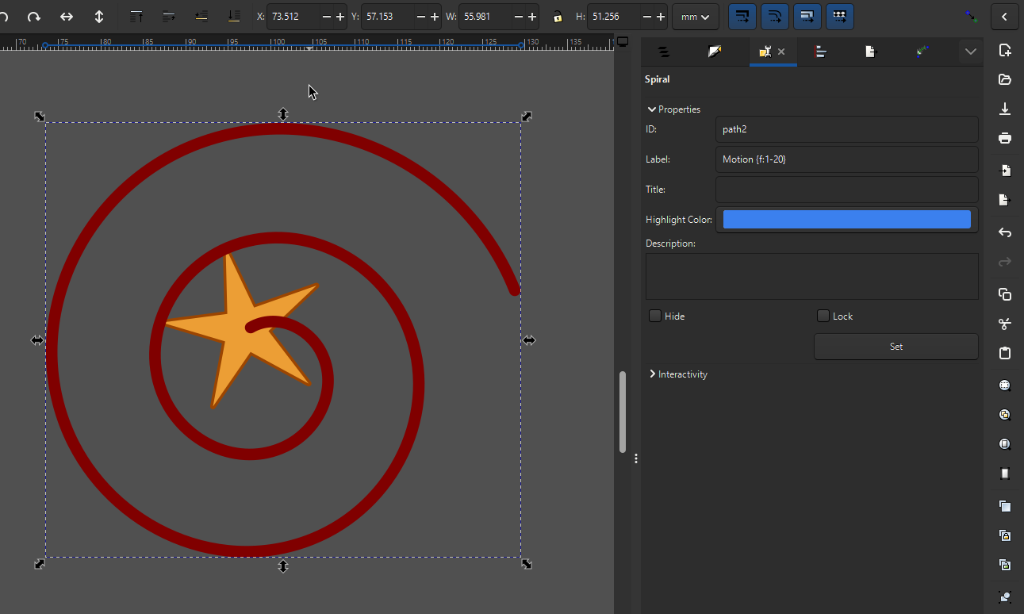
Move {f:1-20} on a spiral trajectory.
Instant Preview in InkAnim Studio
Save your SVG (Ctrl+S) and load it directly into InkAnim (or drag-and-drop it into the application window). InkAnim automatically parses the motion path, synthesizes the 20 animation frames, and excludes the guide line from the canvas and final GIF:
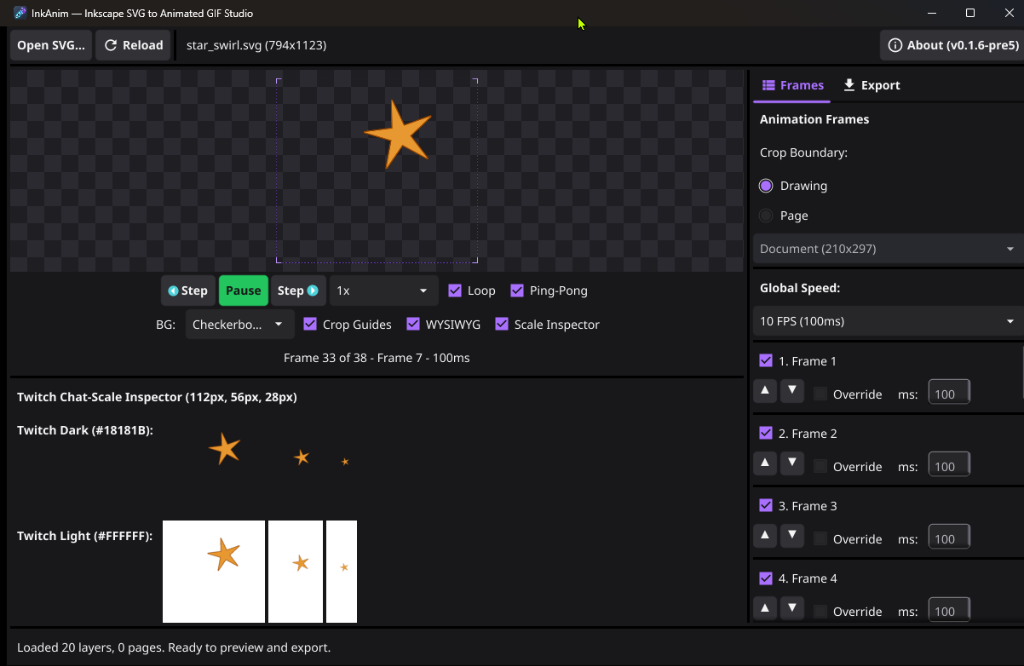
star_swirl.svg. The spiral trajectory is hidden, and the 20 motion frames are immediately playable, inspectable across Twitch chat scales (112px, 56px, 28px) in both dark and light modes, and ready for 1-click GIF export.
⚙️ Syntax Reference
The syntax is compact and space-separated. Available commands include:
Move   {f:<range> [ease:<curve>] [rev] [pingpong:true] [orient:true] [angle:<deg>] [dir:cw|ccw] [pivot:<origin>]}
Rot    {f:<range> [ease:<curve>] [rev] [pingpong:true] angle:<deg> [dir:cw|ccw] [pivot:<origin>]}
Scale  {f:<range> [ease:<curve>] [rev] [pingpong:true] [scale:<multiplier>] [scale-x:<val>] [scale-y:<val>] [from:<val>] [to:<val>] [pivot:<origin>]}
Fade   {f:<range> [ease:<curve>] [from:<val>] [to:<val>] [opacity:<val>]}
Show   {f:<range>}
Hide   {f:<range>}
Depth  {f:<range> z:<signed-int>}
Camera {f:<range> [ease:<curve>] [rev]}
Dist   {factor:<multiplier> | depth:<distance> | fixed}
Color {f:<range> [pingpong:true] [r:<count>] [target:fill|stroke|all] [angle:<deg>]}| Parameter / Modifier | Example | Description |
|---|---|---|
f:<start>-<end> |
f:1-15 | Defines active frame window (1-based index). The object is hidden outside this range (unless Show/Hide rules specify otherwise). |
f:all |
f:all | Active across the entire timeline duration (defaults to 15 frames if all motions omit frame counts). |
ease:<curve> |
ease:out | Acceleration/deceleration curve: linear, in, out, in-out. Defaults to linear. |
pingpong, pingpong:true |
pingpong:true | Oscillates animation forward and backward smoothly (0 → 1 → 0) across the active frame range. |
r:<count>, repeat:<count> |
r:4 | Repeats the modifier animation cycle N times evenly across the specified frame range. |
Color {f:...} |
Color {f:1-30 pingpong:true} | Color modifier attached to a dummy gradient shape inside a group (shape is hidden during render). Mode 1 interpolates solid color across gradient stops. Mode 2 (with angle:<deg>) generates an angular linear gradient highlight sweep. |
target:<target> |
target:fill, target:stroke | Specifies which SVG properties receive Color styling: fill (default), stroke, or all. |
scale:<val> |
scale:1.5 | Uniform scale target multiplier (scales both X and Y from 1.0 to multiplier). |
scale-x:<val>, scale-y:<val> |
scale-x:1.2 | Independent horizontal and vertical scale multipliers (also aliased as x: and y:). |
from:<val>, to:<val> |
from:0.5 to:1.5 | Scale or opacity range interpolation (supports percentages 0-100% or fractions 0.0-1.0 for Fade). |
opacity:<val> |
opacity:50% | Target or constant opacity for Fade (accepts 0-100% or 0.0-1.0 alpha). |
z:<val>, depth:<val> |
z:-1, z:+1 | Relative signed integer modifier applied to layer/group rendering order (e.g. z:-1 renders behind earlier layers, z:+1 pulls forward on top). |
angle:<deg> |
angle:360, angle:-45 | Degrees of rotation for Rot, or directional sweep angle for Color gradient sweeps. |
dir:<cw|ccw> |
dir:ccw | Direction of rotation: clockwise (cw, default) or counter-clockwise (ccw). |
orient:true |
orient:true | Auto-orients object along the curve of the motion path using the path's tangent angle. |
pivot:<origin> |
pivot:180 | Rotation & scale anchor: center (bounding box center), clock degrees (0=top, 90=right, 180=bottom, 270=left), element ID (#pin), or path-start. |
rev / reverse |
rev | Reverses motion direction. Starts offset at trajectory end and arrives at the resting artwork position. |
Show {f:...} |
Show {f:10-50} | Visibility window: group is strictly visible during specified frames and hidden during all other frames. |
Hide {f:...} |
Hide {f:1-10} | Inverted visibility: group is strictly hidden during specified frames and visible during all other frames. |
Camera {f:... ease:...} |
Camera {f:1-20} | Global viewport camera trajectory path. Camera motion translates scene objects in the inverse direction according to each group's parallax distance factor. |
Dist {factor:...}, Dist {depth:...} |
Dist {factor:0.2} | Multi-plane parallax factor relative to Camera. Defaults to 1.0 (focal plane). Use factor:0.1 for distant stars/mountains, factor:1.5 for foreground, or fixed / factor:0 for static HUD overlays. |
📈 Easing Curves
InkAnim includes four built-in easing curves for natural vector motion:
| Curve | Formula | Visual Feel |
|---|---|---|
| linear | \(t\) | Constant speed throughout. Ideal for continuous spinning or steady scrolling banners. |
| in | \(t^2\) | Slow start, rapid acceleration. Great for launch, rocket, or sudden exit effects. |
| out | \(t(2 - t)\) | Fast start, smooth deceleration to a stop. Perfect for slide-in emotes and landings. |
| in-out | Piecewise S-curve | Slow start, rapid middle speed, and smooth landing. Best for natural organic movement. |
🔄 The "rev" Modifier: Inward Entrances
By default, motion starts at the first vertex of your path (\(t = 0.0\)) where \(\Delta = (0, 0)\) and moves toward the endpoint. This means your drawn artwork starts in place and flies away.
When you add rev, the direction is inverted:
- Frame 1 (\(t = 1.0\)): The object starts offset along the line (e.g. offscreen or at the outer spiral).
- Final Frame (\(t = 0.0\)): The object decelerates into \(\Delta = (0, 0)\), resting squarely at your designed SVG artwork position!
Draw your finished emote artwork exactly where you want it to look best in chat. Then draw a path starting from where it should arrive from, and add rev. You never have to manually calculate reverse coordinates!
🍳 Common Animation Recipes
1. The Emote "Slide-In Lurk"
A character peeks up from the bottom of the emote canvas and stops at the center:
Move {f:1-12 ease:out rev}2. The Spiral Dance
An icon spins inwards along a spiral trajectory into its central resting place:
Move {f:1-20 ease:in-out rev}3. Continuous Fly-By
An object traverses from offscreen left to offscreen right throughout the entire emote loop:
Move {f:all ease:linear}4. Squash-and-Stretch Bounce
An animated object compresses upon ground impact and stretches upwards, anchored to its bottom edge:
Scale {f:1-15 ease:in-out from-x:1.4 to-x:0.8 from-y:0.6 to-y:1.25 pivot:180}5. Twinkling & Blinking Stars
Create smooth pulsating fades and visibility pop-ins by combining Fade, Show, and Hide:
Fade {f:1-10 ease:in-out from:100 to:20}
Hide {f:9-13}
6. 2.5D Orbit & Depth Shifting
Solve the classic 2.5D animation challenge (e.g. an orbiting moon or character walking behind an object and then in front) by shifting Z-index stacking order across specific frame windows:
Depth {f:1-10 z:-1}
Depth {f:11-20 z:+1}
7. Multi-Plane Parallax & Camera Pan
Pan the global viewport across a multi-depth landscape or space scene without animating each object manually. Distant layers drift subtly while foreground elements pass swiftly:
<!-- Camera Pan (Root or Guide Layer) -->
Camera {f:1-20 ease:in-out}

<!-- Distant Stars / Clouds Layer -->
Dist {factor:0.1}

<!-- Midground Planet / Mountains Layer -->
Dist {factor:0.5}

<!-- Fixed HUD Overlay -->
Dist {fixed}
8. Color Shifting & Specular Gradient Sweeps
Add a dummy vector element (such as a <rect> or <path>) inside any group and fill it with a linear gradient. The dummy shape is automatically hidden from the render, and its colors are applied to sibling elements:
<!-- Mode 1: Solid Color Shifting (Interpolates across gradient stops) -->
Color {f:1-30 pingpong:true target:fill}

<!-- Mode 2: Directional Gradient Sweep / Shimmer along angle -->
Color {f:1-60 angle:-45 r:4 target:stroke}
🌟 Live Example: The Star Swirl
Below is a complete, working example built in Inkscape and exported directly via inkanim-cli:
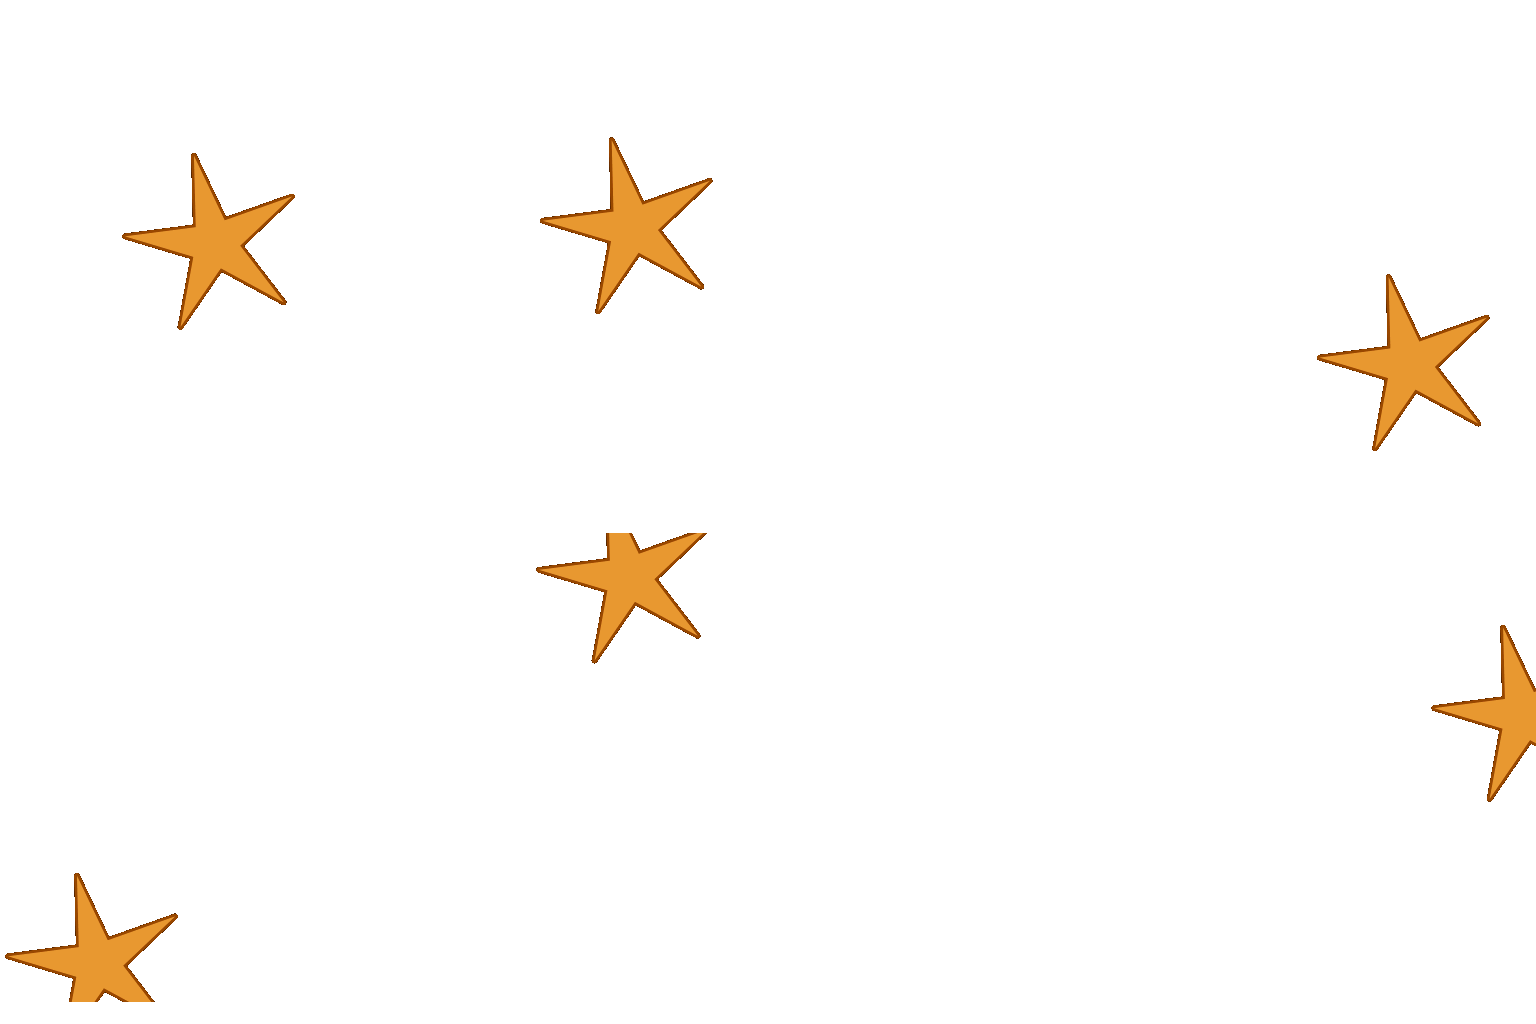
Star Swirl (Twitch Emote Ready)
Authored in Inkscape using a single 5-pointed star and an inward spiral path labeled Move {f:1-20}. Exported in seconds with inkanim-cli:
inkanim-cli -i star_swirl.svg -o star_swirl.gif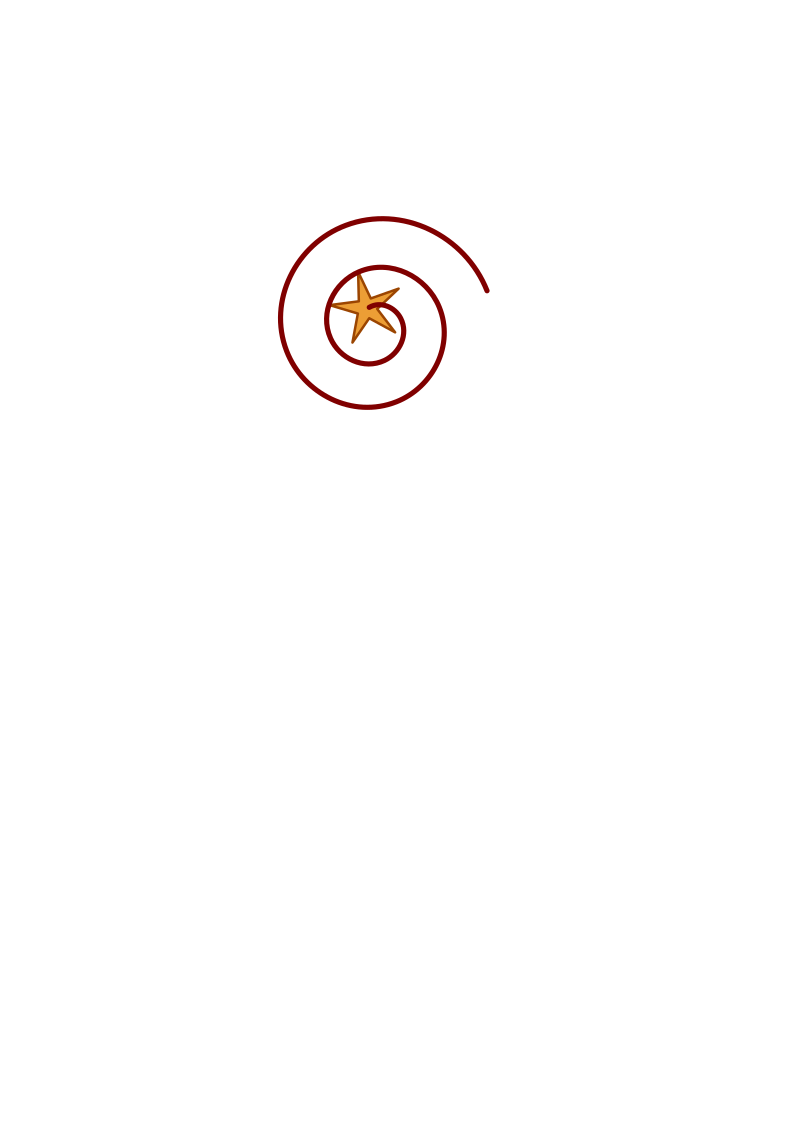
🎬 Previewing & Exporting in InkAnim
Once your SVG file has its graphics and motion trajectories configured, InkAnim makes previewing, verifying, and exporting the animation effortless:
1. In-Studio Playback & Twitch Scale Inspector
- Playback Controls: Use Space or click Pause/Play to test timing in real time. Use Step ◀ / ▶ to inspect individual animation frames.
- Global Speed: Change playback speed (e.g. 10 FPS, 15 FPS, 20 FPS) with a single dropdown selection.
- Looping Modes: Check Ping-Pong for oscillating back-and-forth animations or standard Loop for repeating cycles.
- Twitch Chat Inspector: Check the bottom panel to see your emote previewed simultaneously at actual Twitch chat dimensions (112×112, 56×56, and 28×28 pixels) on both dark (
#18181B) and light (#FFFFFF) backgrounds.
2. 1-Click GIF Export
Switch to the Export tab in the right-hand panel:
- Auto-Square Padding: Automatically centers your artwork on a 1:1 square canvas with transparent padding, fulfilling Twitch emote submission rules without stretching.
- Target Resolution: Export at standard emote resolutions (512×512, 112×112) or custom dimensions.
- Color Quantization & Dithering: Select your palette depth (2 to 256 colors) and toggle Floyd-Steinberg dithering for smooth color gradients.
- Size Validator: InkAnim automatically verifies that the output GIF complies with Twitch's 1.0 MB file size limit.
3. Batch Export via CLI
If you have multiple SVGs or prefer headless automation, you can also use the standalone inkanim-cli executable:
inkanim-cli -i character.svg -o emote.gif -square -size 512 -fps 10| Flag | Default | Description |
|---|---|---|
-i <file> |
(required) | Input Inkscape SVG file path. |
-o <file> |
<input>.gif |
Output animated GIF file path. |
-square |
true |
Pad graphic with transparent margin to guarantee a 1:1 square canvas (Twitch standard). |
-size <px> |
0 (auto) |
Target square dimension (e.g. 512 for Twitch, 128 for Discord, max 4096). |
-width <px>, -height <px> |
0 |
Custom target dimensions when -square=false. |
-fps <num> |
10 |
Playback frame rate / speed in frames per second. |
-colors <2-256> |
256 |
Maximum palette colors for quantization (2 to 256). |
-dither |
false |
Apply Floyd-Steinberg error diffusion dithering for smooth color gradients. |
-pingpong |
false |
Enable ping-pong loop (forward then reverse bounce). |
-check-twitch |
true |
Validate output against Twitch animated emote specifications (< 1 MB). |
-v |
false |
Print version and build information. |